The single most effective upgrade you can make to your workspace is a three-layer lighting setup: ambient light to fill the room, task light focused on your desk, and accent or bias lighting to reduce contrast around your screen. Pair that with tunable color temperature and a dimmer, and you have a setup that supports focus in the morning, eases eye strain through the afternoon, and looks polished on video calls.
Start here, in under 30 minutes:
- Move your desk so the window sits to your side, not in front of or behind you. This one change eliminates the two most common glare and video-call problems at once.
- Add bias lighting behind your monitor. A simple LED strip placed against the wall reduces the contrast between your bright screen and a dark background, which is a primary driver of digital eye fatigue.
- Pick an adjustable task lamp with a Kelvin range of at least 2700K–5000K and a dimmer. Adjustability matters more than wattage.
When shopping for bulbs or fixtures, focus on three numbers: lumens (brightness), Kelvin (color temperature), and CRI (color accuracy). Everything else is secondary.
Table of Contents
- How does home office lighting affect your productivity and health?
- The three layers every home office needs
- What Kelvin and lumen targets should you use?
- Practical placement rules to eliminate glare and shadows
- Which fixtures should you choose for your home office?
- What should you check before buying a lighting fixture?
- Three ready-to-use lighting setups for any home office
- Expert-backed rules and quick formulas
- Key Takeaways
- A note on getting the lighting right
- LightsThings has the fixtures to complete your setup
- Sources and further reading
How does home office lighting affect your productivity and health?
Poor lighting is one of the most underestimated ergonomic problems in a home office. Eye strain, afternoon headaches, and general fatigue are frequently blamed on screen time, but the real culprit is often lighting contrast between a bright monitor and a dim surrounding environment.
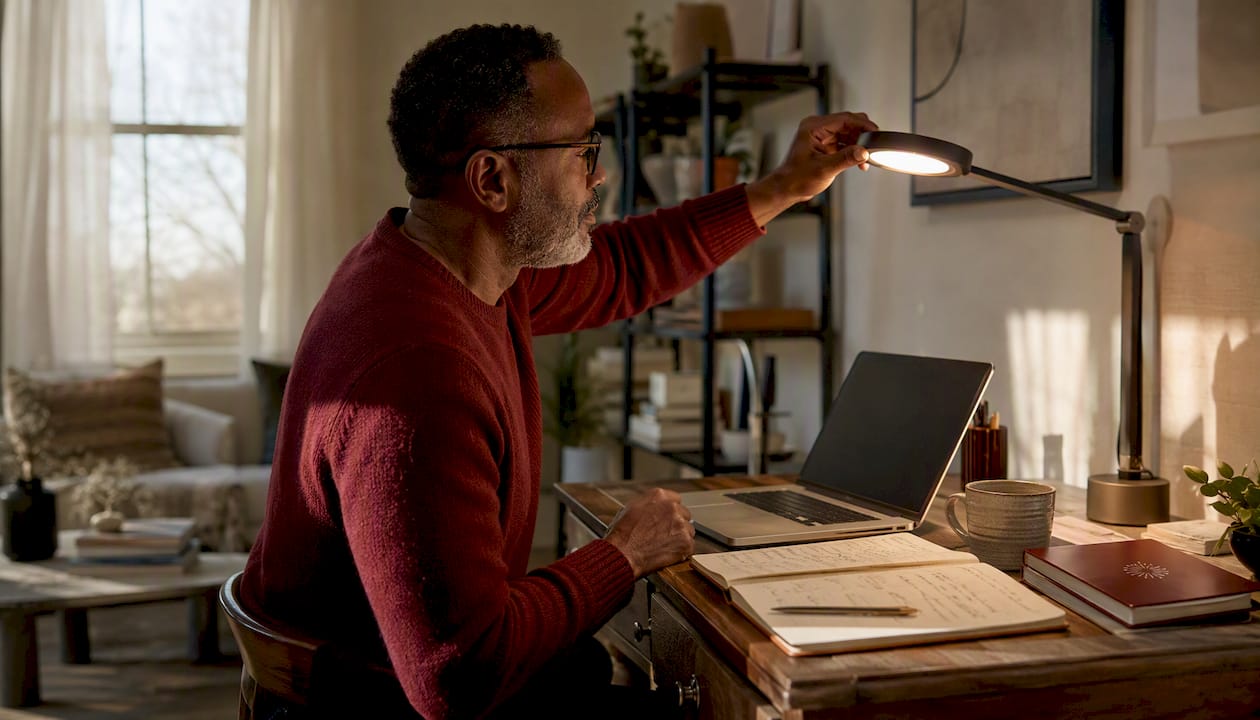
Color temperature also plays a direct role in alertness. Cooler light in the 4000K–5000K range supports daytime focus, while warmer 2700K–3000K tones help your body wind down in the evening. Using cool blue-white light after dark can interfere with your circadian rhythm and sleep quality.
Video calls add another layer of complexity. A camera sensor in low ambient light raises its ISO to compensate, producing grainy video even with a good key light. The fix is not a brighter ring light; it is raising the overall room brightness so the camera has a balanced base to work from.
The three layers every home office needs
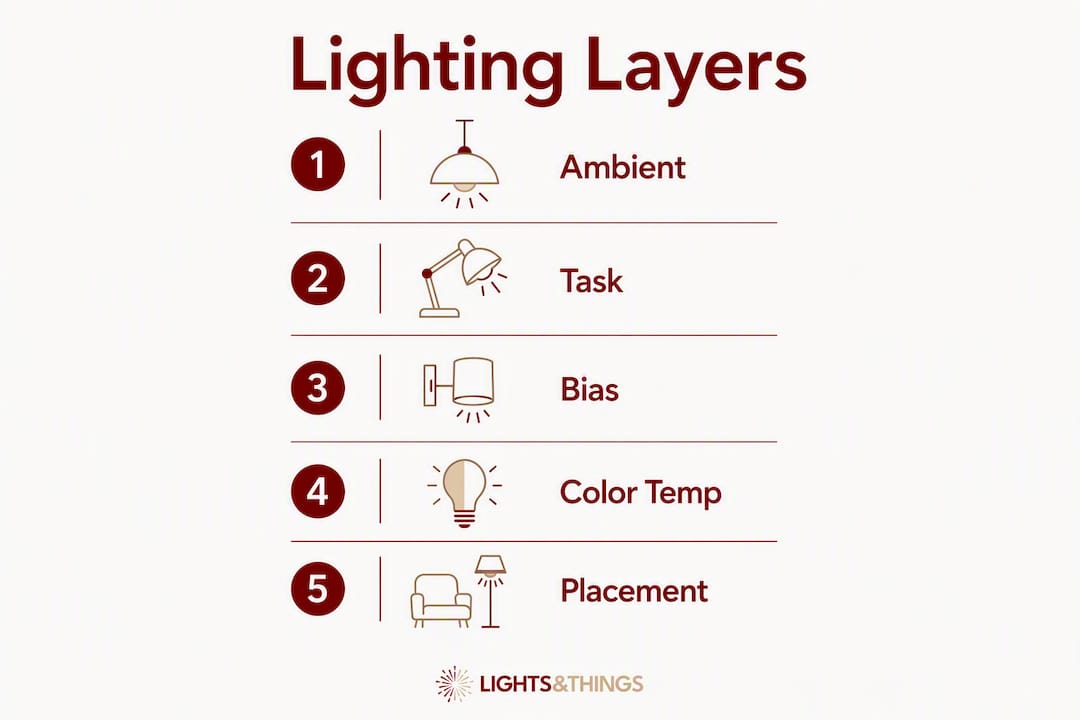
Think of your workspace lighting as three coordinated sources, each solving a different problem. Remove any one of them and the room starts to feel off, even if you cannot name exactly why.
- Ambient lighting fills the room with soft, even light so your monitor is not the only bright object in your field of view. Typical fixtures: ceiling flush mounts, semi-flush mounts, pendants, and torchiere floor lamps.
- Task lighting delivers focused, controllable light directly to your work surface. Typical fixtures: articulating desk lamps, monitor light bars, and under-shelf LED strips.
- Accent or bias lighting reduces contrast at the perimeter of your vision and adds visual depth to the room. Typical fixtures: LED bias strips behind the monitor, wall sconces, and small table lamps on a credenza or shelf.
The layers interact in a specific way. Ambient light raises the room’s baseline brightness, which shrinks the contrast ratio between your screen and its surroundings. Task light then adds precision without creating harsh shadows. Bias lighting handles the narrow zone right behind the monitor, where contrast is highest and most damaging to comfort over a long session.
Pro Tip: If you can only add one thing today, make it bias lighting behind your monitor. It is the smallest purchase with the most immediate impact on eye comfort for screen-heavy work, and it costs less than most desk accessories.
For a deeper look at how layering works across different rooms, the living room lighting checklist from LightsThings applies the same three-source principle with practical fixture examples.
What Kelvin and lumen targets should you use?
Color temperature and brightness are the two specs that determine whether your lighting actually supports work. Here are the targets that matter, organized by use case.
| Use Case | Kelvin Range | Lumen Target (desk) | CRI |
|---|---|---|---|
| Daytime focus work | 4000K–5000K | 300–500 lm | 90+ |
| Reading and writing | 2700K–5000K | 450–800 lm | 90+ |
| Detail or color work | 4000K–5000K | 800–1,200 lm | 90 or higher |
| Evening wind-down | 2700K–3000K | 300–500 lm | 80+ |
| Monitor bias lighting | 4000K–5000K | Low (soft glow only) | 80+ |
Desk task lighting lumen recommendations break down by task type: reading and writing benefit from 450–800 lm, computer-heavy work needs 300–500 lm, and detail work calls for 800–1,200 lm. A dimmable lamp covers all three without a fixture swap.
For room ambient lighting, aim for roughly 300–500 lux across the work area. CRI 90 or higher is the standard worth holding to. Below CRI 80, colors look flat, wood tones lose warmth, and your face on camera takes on a slightly gray cast. The cost difference between a CRI 80 and a CRI 90 bulb is typically just a few dollars.
One trade-off worth knowing: very cool light above 5000K is excellent for alertness during focused work but can feel clinical and harsh by mid-afternoon. A tunable fixture that lets you shift from 5000K in the morning to 3000K after 5 PM gives you both benefits without compromise.
Practical placement rules to eliminate glare and shadows
Where you put your light matters as much as which light you choose. These placement rules address the most common problems: screen glare, keyboard shadows, and flat video-call appearance.
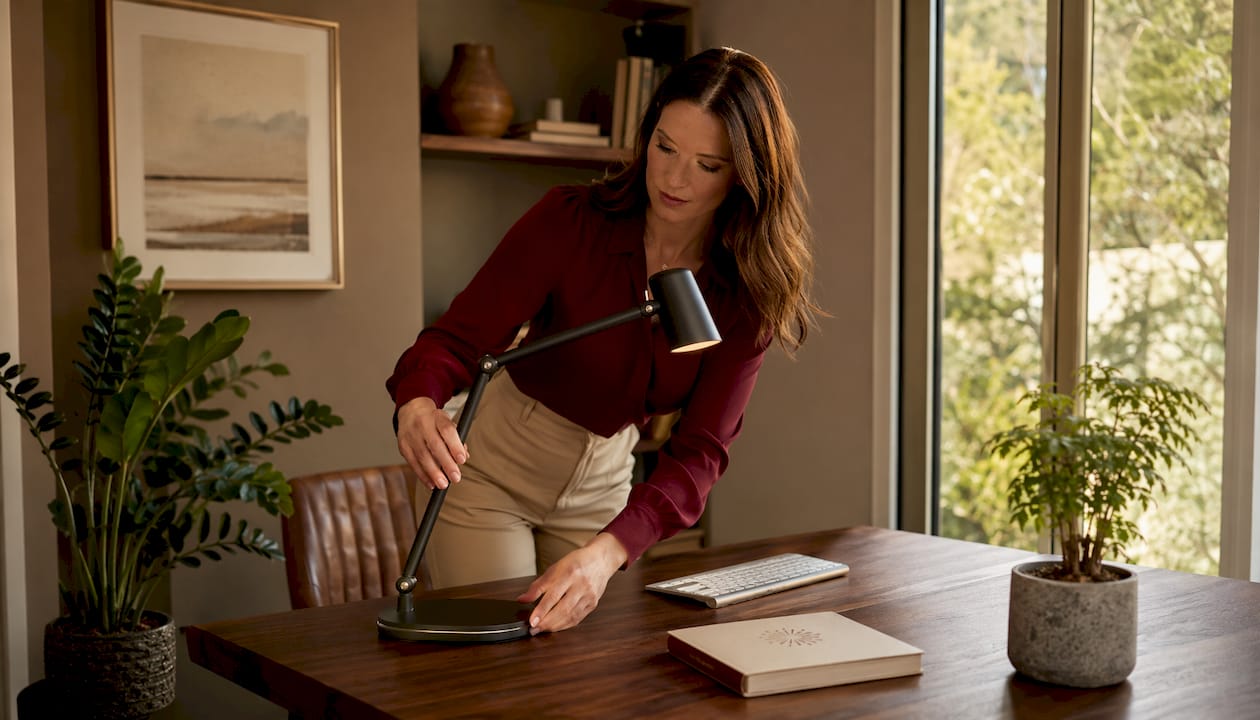
Desk and window orientation. Position your desk so the window is to your side, not directly in front of or behind you. A front-facing window causes squinting and washes out your face on camera. A window behind you creates screen glare and silhouettes you in every meeting. Side-facing windows deliver natural light’s alertness benefits without either problem. If you cannot reposition, sheer curtains or adjustable blinds diffuse direct sun without darkening the room. For more on managing daylight with window treatments, office blinds guidance covers the practical options.
Task lamp placement. Set your desk lamp on your non-dominant side, positioned above eye level and angled downward toward the work surface. This keeps the light source out of your direct line of sight and prevents reflections on your monitor. If you can see the lamp reflected in your screen, it is in the wrong position.
Bias lighting. Mount an LED strip directly behind your monitor, centered on the wall. The goal is a soft, diffused halo, not a bright secondary light source. Bias lighting reduces perceived contrast between your screen and its surroundings, which is the primary mechanical cause of eye strain during long sessions.
For video calls, the single most important rule is to have your main light source in front of you and slightly above eye level, not behind you. A window or lamp facing you fills in shadows and gives the camera an even, flattering base. If the room is dim relative to your key light, the camera raises its ISO and produces grainy video regardless of key-light quality.
Pro Tip: Match the color temperature of your key light to your ambient room light for video calls. Mixing a 2700K lamp on one side with 5000K daylight from a window creates an uneven color cast that reads as unflattering on camera, even when the overall brightness looks fine to your eye.
Which fixtures should you choose for your home office?
Each fixture type serves a specific role in the layered system. Here is how to match them to your space, style, and budget.
- Desk lamps are the most versatile task light. An articulating arm lamp lets you direct light precisely, and models with adjustable Kelvin and dimming cover every task from reading to screen work. Budget options start around $30; midrange models with full tunability run $60–$120.
- Monitor light bars clip to the top of your screen and project light downward onto the desk without any spill onto the display itself. They eliminate task-light glare on glossy screens and take up zero desk space. A strong choice for compact setups.
- Ceiling fixtures (flush mounts, semi-flush mounts, pendants, chandeliers) handle the ambient layer. Dimmable overhead fixtures are the single most impactful ambient upgrade because they let you scale brightness across the day. LightsThings carries ceiling fixtures across a wide range of styles, from clean contemporary flush mounts to statement chandeliers that double as design anchors.
- Floor lamps and torchieres are the best portable ambient solution when you cannot modify the ceiling. A torchiere aimed at a white ceiling can add meaningful bounce light to a room without any installation. They also work well as a third accent source in a corner.
- Wall sconces add perimeter light and visual warmth without consuming desk or floor space. They work particularly well in dedicated offices where you want the room to feel considered rather than purely functional.
- Smart bulbs and tunable fixtures let you schedule Kelvin and brightness shifts across the day, which supports your circadian rhythm without manual adjustment. Fixing the physical layout and layering first is the right priority; smart controls add measurable value once the foundation is in place.
For style matching: a minimal desk setup pairs well with a sleek monitor bar and a simple articulating lamp. A cozy traditional office benefits from a warm-toned table lamp and a sconce or two. A multiuse room calls for flexible fixtures, such as a floor lamp you can reposition and a plug-in pendant that does not require rewiring.
LightsThings’s ceiling lighting design guide walks through fixture sizing and dimming options if you are choosing an overhead for the first time.
What should you check before buying a lighting fixture?
A few minutes on a product page can save you from a fixture that looks right but performs poorly. Here is what to verify before you add anything to your cart.
Specs to confirm:
- Lumens and Kelvin range (or tunability) listed explicitly, not just wattage
- CRI rating of 90 or higher for task and ambient fixtures
- Dimming type: look for triac or 0–10V dimming; avoid fixtures with no dimming spec at all
- Arm reach and adjustability for desk lamps
- Mounting type and whether it matches your ceiling or desk setup
- Warranty and return policy, especially for fixtures you cannot test before buying
Room-fit questions to answer first:
- What is your ceiling height? Low ceilings need flush or semi-flush mounts, not pendants.
- What color are your walls? Dark walls absorb light and require higher-lumen sources to compensate.
- How large is your desk surface? A monitor bar covers a single-monitor setup; a wider articulating lamp handles a dual-monitor or large-format desk better.
Red flags to avoid:
- No lumen or Kelvin spec on the product page
- CRI below 80 or CRI not listed
- “Dimmable” claimed without specifying the dimming method (cheap PWM dimming at low frequencies can cause perceptible flicker)
- Non-returnable fixtures sold as final sale
Pro Tip: LED lamps rated 25,000–50,000 hours last far longer than older bulb types. If you are sensitive to headaches from screen work, specifically look for fixtures that advertise “flicker-free” or specify PWM frequency above 20 kHz. Cheap LEDs that flicker at low frequencies are a common, overlooked cause of afternoon headaches.
Three ready-to-use lighting setups for any home office
Compact desk setup
Fixtures: Monitor light bar + small adjustable desk lamp + plug-in torchiere floor lamp.
The monitor bar handles glare-free task lighting and frees up desk space. The desk lamp provides supplemental focused light for reading or paperwork. The torchiere bounces ambient light off the ceiling to raise the room’s baseline brightness without any installation. This setup covers all three layers for a relatively modest investment and works well in rentals or small rooms where ceiling modifications are not an option.
Prioritize first: The monitor bar, then the torchiere. The desk lamp can wait if budget is tight.
Dedicated home office setup
Fixtures: Dimmable ceiling fixture (flush mount, pendant, or chandelier) + high-CRI adjustable desk lamp + bias lighting strip behind monitor + wall sconce or shelf strip for perimeter accent.
This is the setup that pays off over a full workday. The dimmable overhead gives you control over the room’s baseline brightness from morning to evening. A high-CRI desk lamp (CRI 90+) makes documents, color work, and fine detail easier on the eyes. Bias lighting handles screen contrast. The sconce or shelf strip adds the third perimeter source that keeps the room from feeling like a single bright island in a dark space.
Prioritize first: The dimmable ceiling fixture, then the desk lamp.
Shared or multiuse space
Fixtures: Plug-in pendant or adjustable track light for ambient + clamp lamp for task + LED strip for bias and perimeter accent.
Flexibility is the priority here. Plug-in pendants require no electrical work and can be repositioned. A clamp lamp attaches to a shelf or desk edge and folds away when the space shifts to another use. LED strips behind the monitor or under a shelf add the accent layer without permanent installation.
Pro Tip: In a multiuse room, smart bulbs in your existing ceiling fixture are often the highest-ROI ambient upgrade. You can schedule a cooler, brighter setting for work hours and a warmer, dimmer setting for evenings, all without touching a switch.
Expert-backed rules and quick formulas
The core principle behind every recommendation in this guide comes down to one rule: use at least three light sources for any full-day home-office setup. In rooms under roughly 100 square feet, two sources can suffice, but the contrast risk increases and fatigue tends to arrive earlier in the day.
“A well-thought-out home office lighting setup can genuinely change how you feel and how you perform across a full workday.” — DataWorkGear
The numeric formulas worth keeping:
- Desk task light: 300–500 lm for screen work, 450–800 lm for reading and writing, 800–1,200 lm for detail work
- Room ambient target: 300–500 lux across the work area
- Daytime Kelvin: 4000K–5000K for focus; 2700K–3000K after work hours
- CRI floor: 90+ for task and ambient; 80+ acceptable for accent and bias
Side-facing windows remain the best natural light source for alertness and mood, particularly in the morning. When no windows are available, tunable smart lighting that shifts from cool to warm across the day simulates the circadian cues that natural daylight provides. The hybrid approach that practitioners consistently recommend: a manual task lamp for precision control, paired with smart ambient and perimeter bulbs for scheduled Kelvin shifts.
Key Takeaways
A layered setup with multiple light sources, tunable color temperature, and high CRI bulbs delivers the best combination of productivity, eye comfort, and video-call appearance for any home office.
| Point | Details |
|---|---|
| Use three light sources | Ambient, task, and accent/bias together prevent contrast issues that can cause eye strain and fatigue. |
| Match Kelvin to the time of day | Use cooler color temperatures for daytime focus; shift to warmer tones in the evening to support sleep. |
| Hit the right brightness | Desk task lighting should be sufficient for screen work and detail tasks; room ambient light should provide comfortable overall illumination. |
| Place your desk side-on to windows | Side-facing windows deliver natural light benefits without monitor glare or video-call silhouette problems. |
| LightsThings for fixture selection | LightsThings carries desk lamps, floor lamps, ceiling fixtures, and sconces across every price tier, with free shipping, easy returns, and financing available. |
A note on getting the lighting right
There is a tendency to treat home-office lighting as a single purchase decision: one lamp, one overhead, done. What we see again and again is that the gap between a comfortable, productive workspace and a frustrating one almost always comes down to the third source, the one most people skip entirely.
It does not have to be expensive or complicated. A wall sconce, a small table lamp on a shelf, a bias strip behind the monitor: any of these can close the gap between a bright desk zone and a dim surrounding room. The fixture itself matters less than its placement and its color temperature.
At LightsThings, we approach home-office lighting the same way we approach any room: start with the layer that does the most work, then build outward. For most people, that means a quality task lamp first, a dimmable ambient source second, and a well-chosen accent piece third. CRI, adjustability, and finish are the three specs we weigh most heavily when curating our catalog, because those are the details that determine whether a fixture actually performs across a full workday or just looks good in a product photo.
If you are not sure where to start, try one small change: a monitor bar or a bias strip. The improvement in end-of-day comfort is noticeable within a week.
LightsThings has the fixtures to complete your setup
The layered approach described in this guide maps directly to what LightsThings carries. For the ambient layer, the Crystal Chandelier Double Helix 7-Light is a statement ceiling fixture that anchors a dedicated office while delivering the diffused overhead light a dimmable setup needs. For larger rooms or higher ceilings, the 12-Light version scales up the presence without changing the approach.
Beyond statement pieces, LightsThings’s catalog covers every layer: floor lamps and torchieres for portable ambient solutions, table lamps for desk task lighting and accent sources, and sconces for perimeter warmth. Every category is available with free shipping on qualifying orders, easy returns, price matching, and financing options, so you can build your setup one layer at a time without committing to everything at once.
The recommended path: start with your task lamp, then add an ambient ceiling fixture or floor lamp, then finish with an accent piece that matches your room’s style. Browse the full lighting collection at LightsThings to find fixtures that fit both your workspace and your aesthetic.
Sources and further reading
| Source | What it covers |
|---|---|
| DataWorkGear: Home Office Lighting Setup Guide | Step-by-step layered setup, troubleshooting table, lux targets |
| BenQ Knowledge Center: Best Home Office Lighting | Kelvin ranges for productivity and circadian support; natural light management |
| Deskbly: Home Office Lighting Guide | Layering priority order; video-call key-light balance |
| Designlike: Home Office Lighting | Bias lighting mechanics; three-source minimum; torchiere bounce lighting |
| Linea: How to Choose a Desk Lamp | Lumen targets by task type; LED lifespan and flicker guidance |
| Curated by Hower: Modern Home Office Lighting | Three-layer principle; CRI guidance; video-call color temperature |
| LightsThings: Living Room Lighting Checklist | Layering ambient, task, and accent fixtures across residential spaces |
| LightsThings: How to Design Ceiling Lighting | Ceiling fixture selection, sizing, and dimming options |