Most home LED flicker comes down to two culprits: a control device that isn’t built for LEDs (an old dimmer or a mismatched smart switch) or a bulb whose driver is starting to fail. Your first move should always be the cheapest one, power down, reseat the bulb, or swap it for a known-good LED to see if the flicker follows. If it doesn’t clear up, or you notice arcing, a burning smell, or flicker spreading across multiple fixtures, stop troubleshooting and call a licensed electrician.
TL;DR:
- Most flickering originates from incompatible dimmers, failing drivers, or voltage fluctuations caused by appliances on the same circuit.
- Troubleshooting should start with bulb reseating and swapping to identify whether the issue is the bulb or wiring, saving unnecessary replacements.
- Replacing incompatible dimmers with LED-compatible trailing-edge models often provides a long-term solution, especially for older TRIAC dimmers.
- Signs of driver failure include flicker worsening over time, buzzing sounds, warmth, or burning smells, indicating the need for fixture replacement or repair.
- If flickering coincides with appliance operation or wiring issues, calling a licensed electrician is necessary to prevent fire hazards and ensure safety.
Table of Contents
- What Causes LED Lights to Flicker in the First Place?
- How Do You Isolate the Cause of LED Flicker?
- Step-by-Step Fixes for Each Common Cause
- Fixing Dimmer and Smart Switch Flicker Problems
- When the Built-In Driver or Fixture Is the Real Problem
- Electrical Safety: When to Stop DIY and Call an Electrician
- How to Prevent LED Flicker Before It Starts
- How Lights & Things Helps You Choose Flicker-Free Lighting
- A Realistic Take on DIY Flicker Fixes
- Replacing Instead of Repairing: A Faster Path to Steady Light
- Sources
- FAQ
What Causes LED Lights to Flicker in the First Place?
LED flicker almost always traces back to one of five sources: a low-quality or failing driver inside the bulb, a loose electrical connection, a dimmer that predates LED technology, a smart switch fighting the bulb’s electronics, or voltage dips on a shared circuit. Every LED bulb runs on a small internal driver that converts your home’s alternating current into the steady, low-voltage output the LED chip actually needs. When that driver is poorly designed or degrading, it can’t smooth the power properly, and you get visible flicker instead of steady light, a pattern well documented in Nichia’s application note on LED flicker in lamps and luminaires.
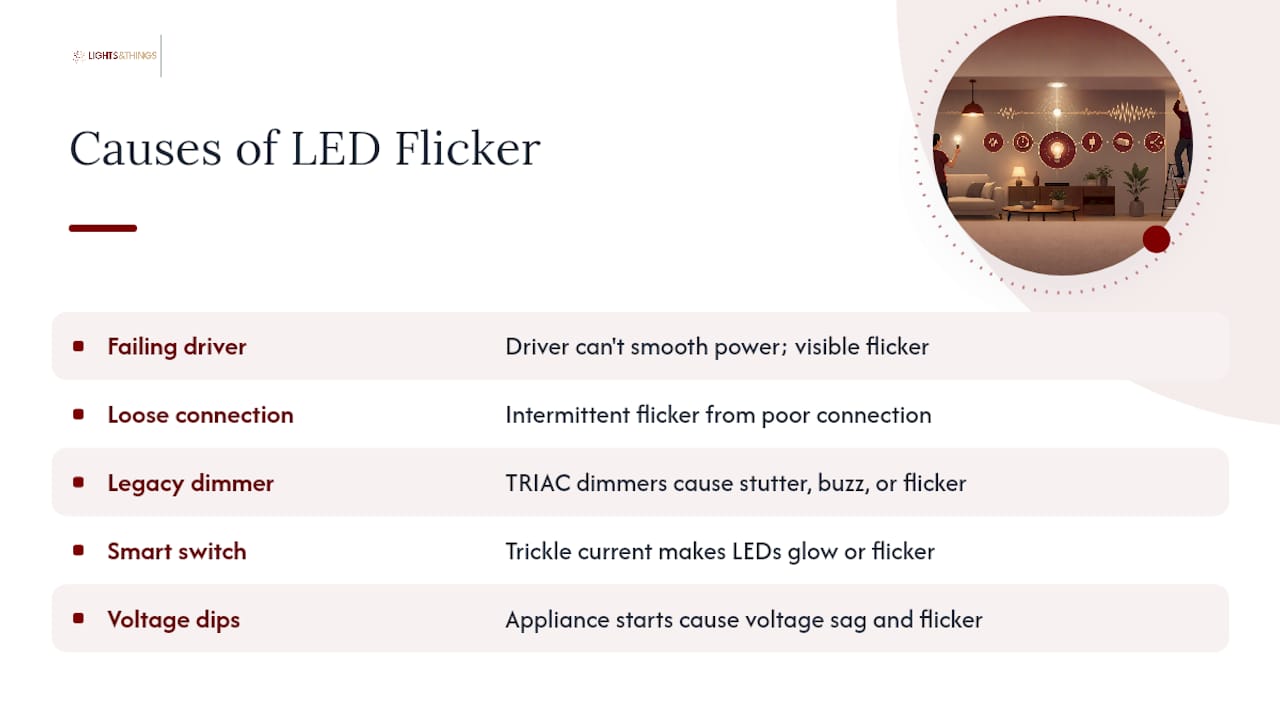
Dimmer incompatibility is the single most common trigger homeowners run into. Older TRIAC dimmers were engineered for incandescent bulbs, which draw far more current than LEDs. Put an LED on one of those legacy dimmers and the mismatch between the dimmer’s minimum load and the bulb’s tiny power draw can produce a stutter, buzz, or flicker at almost any brightness setting, a problem LEDVANCE’s flicker guide calls one of the leading fixable causes. Smart switches introduce a related issue: some models pass a trickle of current through the load even when “off” to keep their electronics powered, and that leak current can cause LEDs to glow faintly or flicker.
Voltage fluctuations round out the list. If your lights dim or flicker whenever the air conditioner, well pump, or a major appliance kicks on, you’re watching a voltage sag play out in real time, and it’s a sign the circuit is being asked to do too much at once. Broader mains and driver interactions, including how dimmers and drivers respond to distortions in your home’s power, are covered in more technical depth in this review of LED flicker and driver interactions.
How Do You Isolate the Cause of LED Flicker?
Before you replace anything, spend ten minutes figuring out exactly where the flicker lives. Isolating the problem to a bulb, a fixture, a switch, or a whole circuit tells you which fix actually applies, and it saves you from buying a new dimmer when the real issue was a $6 bulb.
- Turn off power at the switch (or breaker, if you’re opening a fixture) before touching anything.
- Watch the pattern. Does the flicker happen only when dimmed, only at startup, only when another appliance runs, or all the time?
- Reseat the bulb. Loose contact between the bulb base and socket is the fastest fix there is; a firm quarter turn resolves a surprising number of cases.
- Swap the bulb into a different fixture you know works well. If the flicker travels with the bulb, the bulb or its driver is the problem.
- Try a known-good LED bulb in the suspect socket. If the new bulb flickers too, the issue lives in the fixture, switch, or wiring, not the bulb.
- Check whether the flicker follows the switch or the whole circuit. Flip a nearby light on the same breaker. If it flickers too, you’re likely dealing with a shared circuit or panel issue.
This swap test resolves the majority of homeowner cases in minutes, because it draws a hard line between “the bulb is bad” and “something upstream is bad,” according to the isolation-first approach recommended by Lighting.
Pro Tip: Keep one bulb you trust completely, a dimmable LED from a brand with a solid track record, as your permanent “test bulb.” Swapping it into any suspect socket gives you an instant, reliable answer without buying anything new.
If at any point you see sparking, smell something burning, or notice the socket or switch plate feels warm to the touch, stop the test immediately and treat it as an electrical safety issue, not a lighting one.
Step-by-Step Fixes for Each Common Cause
Once you know where the flicker lives, the fix is usually narrow and specific. Here’s how to handle each scenario.
If the flicker follows the bulb:
- Try the same bulb in another fixture to confirm the driver is failing, not just having a bad day.
- Replace it with a dimmable-rated LED from a reputable brand. Cheap, unbranded bulbs are far more likely to ship with underbuilt drivers that can’t handle dimming or voltage swings.
- If the fixture uses multiple bulbs and only one flickers, that single failing bulb can sometimes destabilize the others on the same circuit. Replacing the one “bad apple” often settles the whole fixture, a pattern 1000Bulbs’ troubleshooting guide flags as a common and easy fix.
If the flicker follows the socket or fixture:
- Power off the circuit at the breaker, not just the switch, before opening anything.
- Inspect the socket’s center contact tab. It should sit slightly raised; if it’s flattened or corroded, the bulb base won’t make firm contact.
- Check that the socket threads aren’t loose or cracked. A socket that wobbles when you touch the bulb needs to be replaced, not repaired.
- Look at the wire connections feeding the fixture. Loose wire nuts or backed-out screw terminals are a frequent, and fixable, cause of intermittent flicker.
If the flicker follows the dimmer switch:
- Confirm the dimmer’s model number and cross-check it against the bulb manufacturer’s compatibility list, when one is published.
- Test by setting the dimmer to full brightness. If the flicker disappears at 100% but reappears anywhere below that, the dimmer itself is the likely mismatch, not the bulb.
- Older TRIAC leading-edge dimmers are often incompatible with LEDs. If your compatibility check indicates a mismatch, plan on replacing the dimmer rather than chasing bulb after bulb. Our guide to whether LED bulbs are dimmable walks through what “dimmable” labeling actually guarantees.
If a smart switch or app-controlled bulb is involved:
- Check whether the switch requires a neutral wire and whether yours is actually connected. A missing neutral is a common source of ghosting and flicker on smart circuits.
- Look for a firmware update for the switch or bulb; manufacturers frequently patch dimming-curve bugs after launch.
- Temporarily swap in a standard mechanical switch. If the flicker vanishes, the smart control (not the bulb or wiring) is the cause.
If flicker tracks with appliance use:
- Note exactly which appliance triggers it, an AC compressor, a well pump, a garage door opener, and whether it happens on startup only.
- This pattern usually points to voltage sag on a shared circuit rather than anything wrong with the light itself. Separating the lighting circuit from heavy appliance loads, or having an electrician inspect the panel, is the long-term fix.
Pro Tip: After any fix, don’t just glance at the light once. Run it through a full cycle, on, dimmed to its lowest setting, and back to full, and let it sit for a few minutes. Some driver and dimmer issues only reveal themselves after the components warm up.
Fixing Dimmer and Smart Switch Flicker Problems
Dimmer mismatches deserve their own closer look, because they’re the leading cause of LED flicker that homeowners can fix without an electrician. The type of dimmer you have matters more than most people realize.
Leading-edge (TRIAC) dimmers chop the front of the AC waveform and were built for incandescent and halogen loads. Trailing-edge dimmers, which use electronic MOSFET switching to cut the back end of the waveform instead, tend to pair far more smoothly with LED drivers, producing steadier light across the full dimming range, largely because they avoid the waveform asymmetries that trip up sensitive LED electronics, as explained in Richtek’s application note on flicker mitigation.
Work through this sequence to isolate a dimmer problem:
- Set the dimmer to full brightness (100%). If the flicker disappears completely, the dimmer’s dimming circuit, not the wiring, is implicated.
- Check the dimmer’s rated minimum load. Many legacy dimmers need 40 to 60 watts of load to function properly; a handful of LEDs pulling 8 to 10 watts combined can fall under that threshold and cause flicker or buzzing.
- If the load is too low, look at “no minimum load” LED-rated dimmers, or add a compatible bypass device only if the dimmer manufacturer explicitly supports one for your setup, following Leviton’s guidance on avoiding LED flicker.
- For smart switches, confirm neutral-wire requirements and check the manufacturer’s published compatibility list before assuming the bulb is at fault.
- As a final test, temporarily swap in a basic, non-dimming switch. If the flicker disappears entirely, you’ve confirmed the control device, not the bulb or the wiring, is the root cause.
Once you’ve confirmed a dimmer mismatch, replacing it with an LED-rated trailing-edge model is usually a permanent fix, not a temporary patch.
When the Built-In Driver or Fixture Is the Real Problem
Some fixtures, especially recessed cans, under-cabinet strips, and outdoor fixtures, house their driver inside the fixture rather than the bulb. When that driver fails, no amount of bulb swapping will help.
Watch for these warning signs of a failing integrated driver:
- Flicker that gets worse the longer the fixture has been running, suggesting heat is destabilizing a weak component.
- A faint buzzing or humming sound coming from the fixture housing itself.
- Any warmth, discoloration, or a faint burning odor around the fixture, which means it’s time to stop and call a professional immediately.
- Flicker that persists even after you’ve confirmed the bulb and dimmer both test fine elsewhere.
Deciding between repair and replacement usually comes down to access and cost. A driver you can reach and swap without demolishing drywall is worth fixing, especially if the fixture is still under warranty. A driver buried in a sealed or recessed housing often makes full fixture replacement the more practical, and safer, choice. Outdoor and enclosed fixtures add another wrinkle: moisture intrusion and poor heat dissipation inside a sealed enclosure accelerate driver failure, so a flickering outdoor light deserves a look at its weatherproof rating, not just its bulb.
Electrical Safety: When to Stop DIY and Call an Electrician
Some symptoms mean the problem has moved beyond bulbs and dimmers into your home’s wiring, and that’s not a DIY repair.
Call an electrician immediately if you notice:
- Visible arcing, sparking, or scorch marks near a switch or fixture.
- Any smell of burning plastic or ozone.
- A breaker that trips repeatedly when the lights are on.
- Flicker that shows up across multiple, unrelated circuits at once.
Loose wire terminations are a genuine fire risk, not just an annoyance, because a poor connection generates heat every time current passes through it, and that heat has nowhere safe to go inside a wall cavity. An electrician has the tools to safely tighten or replace those terminations and confirm there’s no hidden damage.
Before you call, jot down which fixtures flicker, what pattern you observed (constant, appliance-triggered, dimmer-only), what’s on the same circuit, and anything you’ve changed recently, a new dimmer, a new bulb brand, a new smart switch. That context turns a service call into a fast diagnosis instead of a repeat visit.
How to Prevent LED Flicker Before It Starts
The best flicker fix is the one you never have to make. A little care at purchase time avoids most of the headaches covered above.
- Buy bulbs explicitly labeled “dimmable” if they’re going on any dimmer circuit; standard LEDs aren’t built to handle a reduced voltage waveform.
- Check the bulb manufacturer’s published dimmer compatibility list before buying either the bulb or the dimmer, not after.
- Stick with one bulb brand and model per fixture or per dimmed circuit. Mixing brands with different driver designs on the same dimmer is a common, easily avoidable cause of flicker.
- Favor bulbs from manufacturers that publish real driver specifications rather than vague marketing claims.
- Make sure enclosed or recessed fixtures have adequate ventilation; heat buildup shortens driver life and accelerates flicker over time.
- Keep a short written note of what bulb, dimmer, or switch model you installed and when, so future troubleshooting doesn’t start from zero.
How Lights & Things Helps You Choose Flicker-Free Lighting
Picking the right bulb and fixture combination the first time is the fastest way to skip this whole troubleshooting process. LightsThings publishes buyer resources, including a breakdown of how LED technology compares to older incandescent bulbs and guidance on choosing between LED, incandescent, and smart bulbs, built specifically to help you match bulbs to fixtures and controls before you buy, not after something starts flickering.
Many fixtures and lamps sold come with clear returns policies and warranty coverage, which matters most exactly when a bulb and dimmer combination turns out to be a poor match. That safety net removes the guesswork of buying blind and discovering an incompatibility three weeks later.
A Realistic Take on DIY Flicker Fixes
Most flicker fixes really are this simple: a bulb swap, a firmer seat, a dimmer upgrade. The wiring cases are the exception, not the rule, but they’re the ones where persistence stops being a virtue. Once you land on a fix, standardize the bulb model across that fixture and write it down. That habit alone prevents most repeat service calls. And the line stays the same every time: arcing, burning smells, or flicker spanning multiple circuits means it’s an electrician’s job, not another weekend project.
— Norm Blain
Replacing Instead of Repairing: A Faster Path to Steady Light
Sometimes the smarter move isn’t chasing down a failing driver, it’s replacing the fixture with something built to handle dimming correctly from day one. LightsThings carries curated collections of dimmable table and floor lamps selected with compatibility in mind, so you’re not left guessing whether a new bulb will play nicely with your existing dimmer.

Buying new also sidesteps the driver-replacement dilemma covered earlier. There’s no prying open a sealed fixture or gambling on a part that might not fix the real issue. When you’re browsing, check three things on the product page before adding to cart: the “dimmable” label on any bulb you pair with the fixture, the enclosure rating if it’s going outdoors or somewhere damp, and the return window in case the combination still doesn’t behave the way you expect. Many purchases from such retailers carry a returns policy and warranty coverage built around exactly that kind of risk. If a flickering fixture has you ready to start over, browse the full LightsThings collection and pick a replacement that’s warrantied from the start.
Sources
For a deeper technical dive into flicker-free LED design, the Lampenonline blog on flicker-free LED lighting offers a manufacturer-level explanation of driver and waveform behavior worth reading alongside the guidance above.
- LED flicker in lamps or luminaires — Nichia application note
- Lighting
- LED light flickering: Causes and easy fixes — LEDVANCE
- LED Bulb Flicker: Causes, fixes, and how to prevent it — 1000Bulbs
FAQ
Why Do LED Lights Constantly Flicker?
Constant flicker usually points to a driver that can’t smooth power properly, a dimmer built for incandescent bulbs rather than LEDs, or a loose connection at the socket. Isolating whether the flicker follows the bulb, the switch, or the whole circuit tells you which of those three it is.
Do LED Lights Flicker When They’re Going Bad?
Yes. A failing LED driver often produces flicker that worsens as the bulb runs longer or warms up, which is one of the clearest signs the bulb itself, not the dimmer or wiring, needs replacing.
Is LED Flickering a Fire Hazard?
Flicker caused by a bulb or dimmer mismatch isn’t a fire risk on its own, but flicker caused by loose wiring connections is, since a poor termination generates heat every time current flows through it. Any flicker paired with arcing, warmth, or a burning smell means you should call an electrician right away.
What Kind of Capacitor Helps Stop LED Flicker?
Some dimmer-load mismatches can be stabilized with a bypass capacitor or load-mimicking device designed for that specific dimmer, but it should only be added if the dimmer manufacturer explicitly supports one for your model. Using an unsupported bypass device can mask a wiring problem rather than fix it, so check compatibility first.